If you are currently paying a tons of money to speed up your Amazon S3 with Content Delivery Network services I have a good news for you. You can start using FREE UNLIMITED CloudFlare CDN for your Amazon S3.
Preparation
Before we started, a few things you need to have and need to know in order to setup Amazon S3 with Cloudflare as CDN.
Things You Need to Have
- Own a Domain. If not buy one at GoDaddy.com
- Own a Amazon AWS account. If not register one at HERE
- Own a CloudFlare account. If not register at Cloudflare.com
Tutorial
Step 1: Create a new bucket
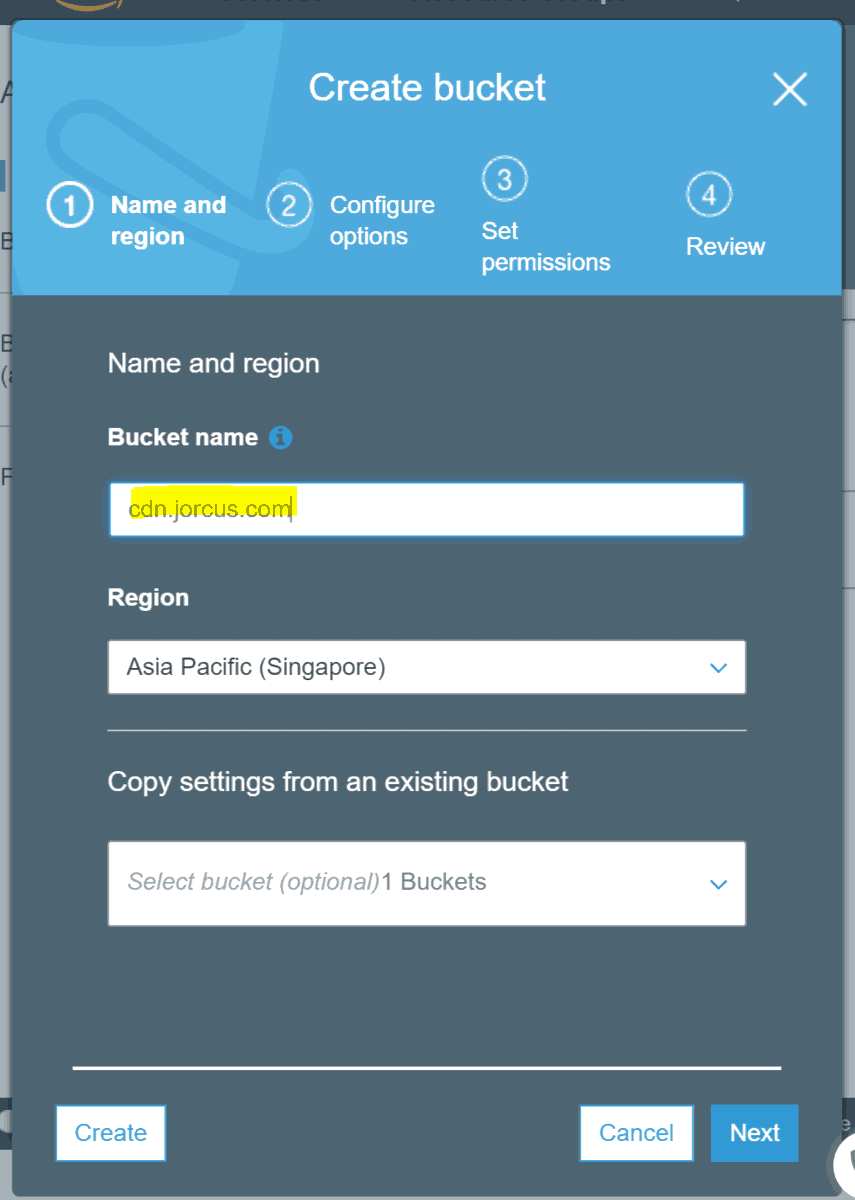
First of all, open your Amazon S3 account go to S3 Buckets Page and create a new bucket.

Then, name the bucket name to the domain/sub-domain you want to use.
eg: “www.example.com“, “cdn.example.com” OR any sub-domain as long as own the domain.
In my case, I create a sub-domain for this since I use the “www.jorcus.com” for this blog.
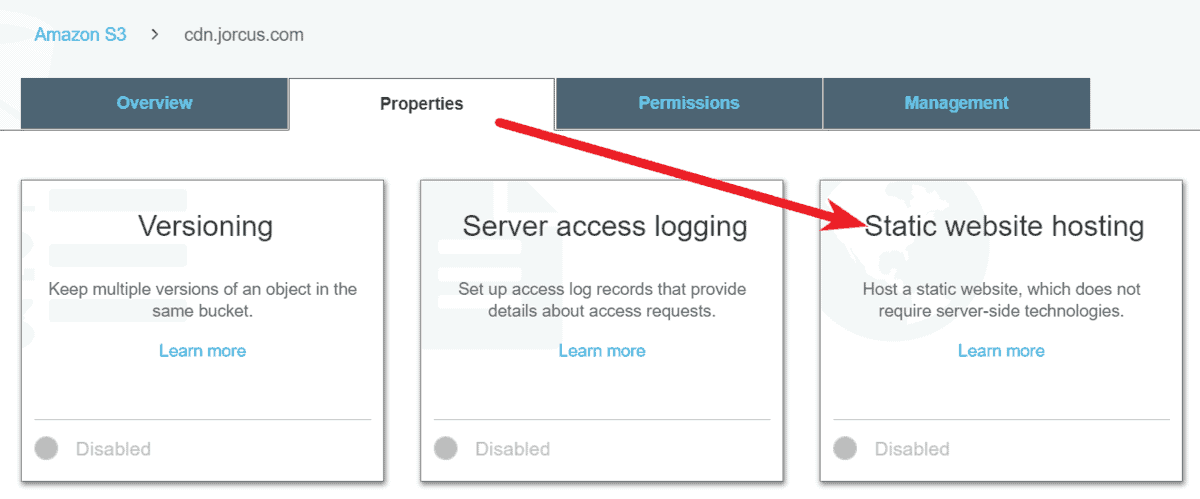
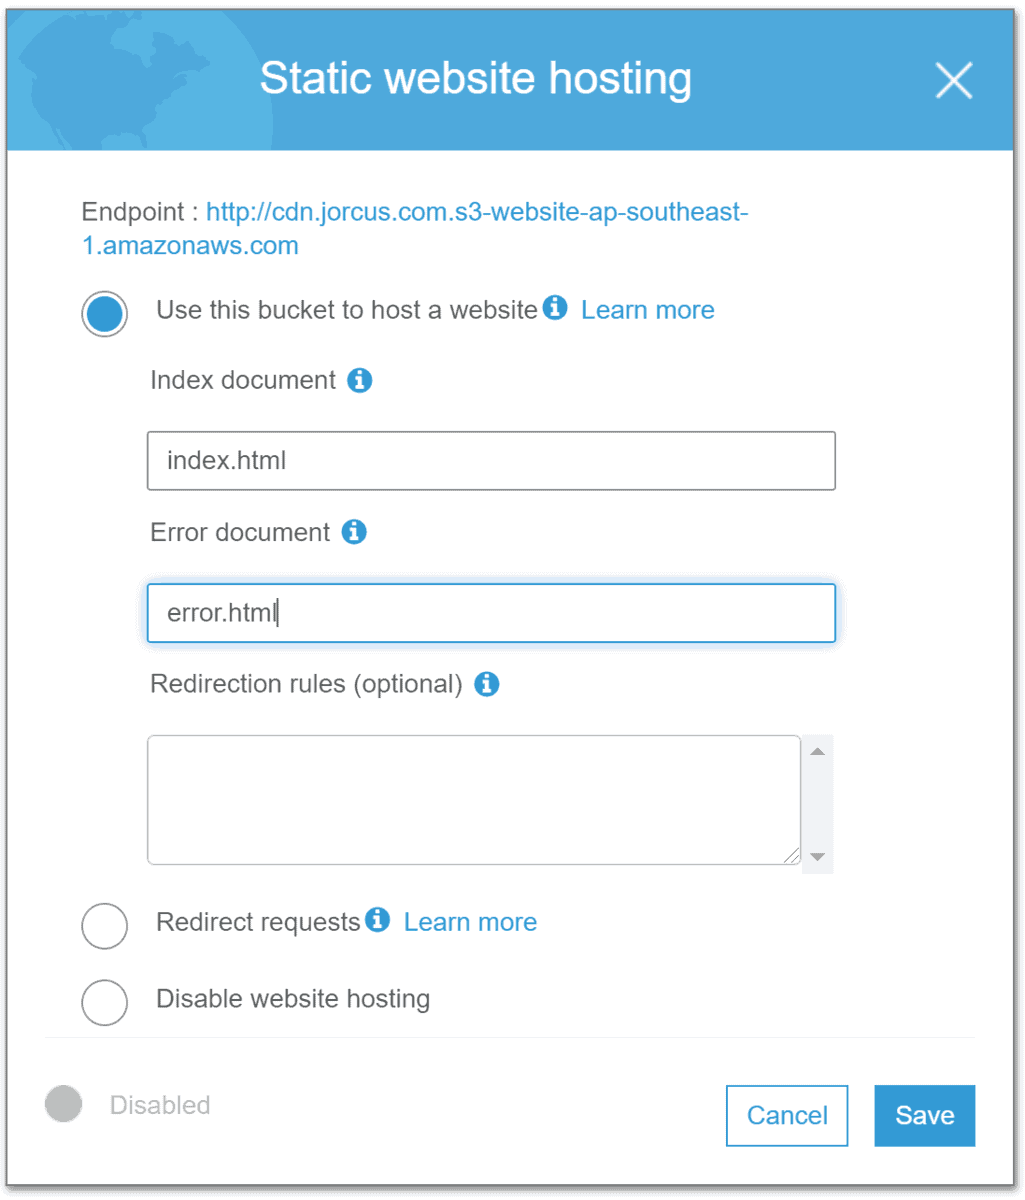
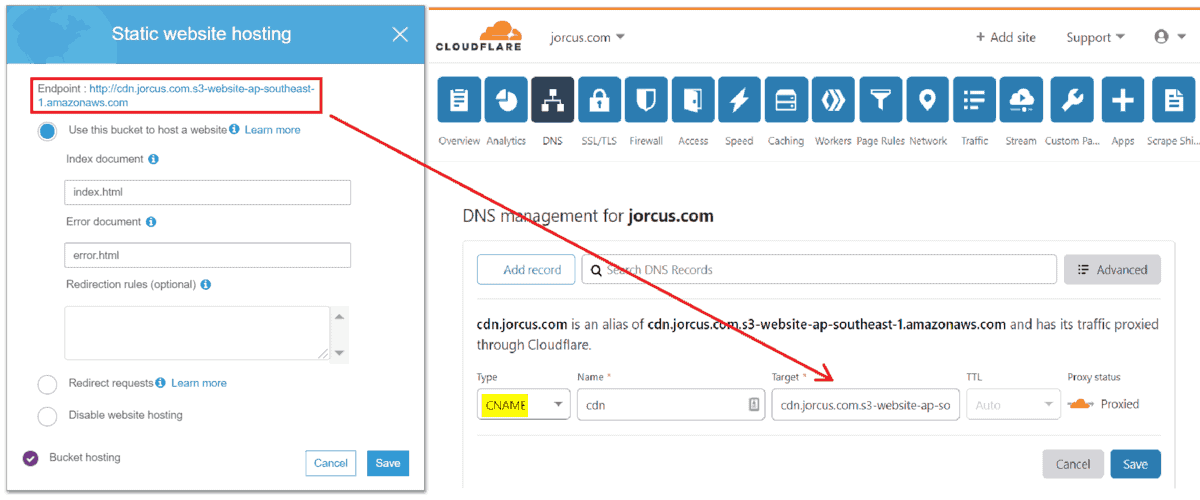
Step 2: Enable the Static Website Hosting
Then, set Index document as index.html. Also set Error document as error.html.
Step 3: Set Permission
Go to the Permissions Tap and set the Bucket Policy
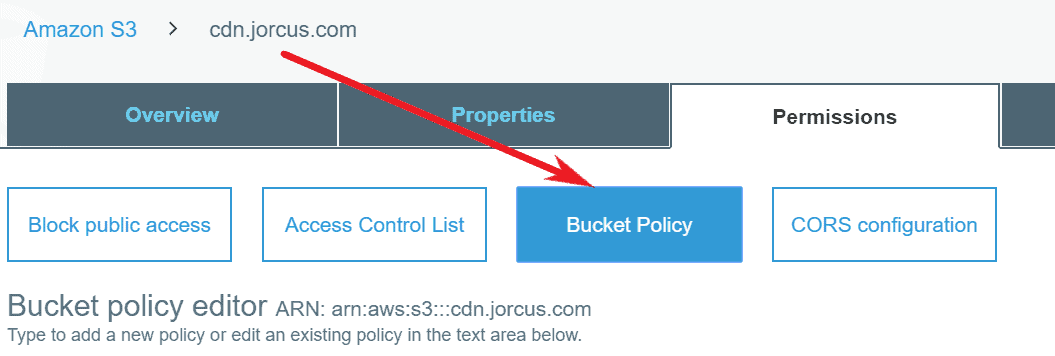
Copy and Paste this code to the Bucket Policy. DON’T FORGET TO CHANGE www.YOURDOMAIN.com/* to your own domain/sub-domain.
{
    "Version": "2012-10-17",
    "Statement": [
        {
            "Sid": "PublicReadGetObject",
            "Effect": "Allow",
            "Principal": "*",
            "Action": "s3:GetObject",
            "Resource": "arn:aws:s3:::www.YOURDOMAIN.com/*",
            "Condition": {
                "IpAddress": {
                    "aws:SourceIp": [
                        "2400:cb00::/32",
                        "2405:8100::/32",
                        "2405:b500::/32",
                        "2606:4700::/32",
                        "2803:f800::/32",
                        "2c0f:f248::/32",
                        "2a06:98c0::/29",
                        "103.21.244.0/22",
                        "103.22.200.0/22",
                        "103.31.4.0/22",
                        "104.16.0.0/12",
                        "108.162.192.0/18",
                        "131.0.72.0/22",
                        "141.101.64.0/18",
                        "162.158.0.0/15",
                        "172.64.0.0/13",
                        "173.245.48.0/20",
                        "188.114.96.0/20",
                        "190.93.240.0/20",
                        "197.234.240.0/22",
                        "198.41.128.0/17"
                    ]
                }
            }
        }
    ]
}
STEP 4: Point your domain DNS servers to Amazon S3 Static Web Hosting URL
NOTE: IF YOU HAVEN’T HAVE AN CLOUDFLARE ACCOUNT, FOLLOW THIS STEP TO ADD UR WEBSITE IN CLOUDFLARE.
- Register/Log-In to your Cloudflare account.
- Add New website Your URL to Cloudflare.
- SELECT FREE PLAN.
- Then Follow Next Step as below.
Add a CNAME record point to the Amazon S3 Static Web Hosting URL without the http:// for your domain/subdomain and Click on the SAVE button.
5. Now, go to the website you purchase the domain and log in to the website. Go to the domain and change the DNS setting base on the instruction from the CloudFlare.
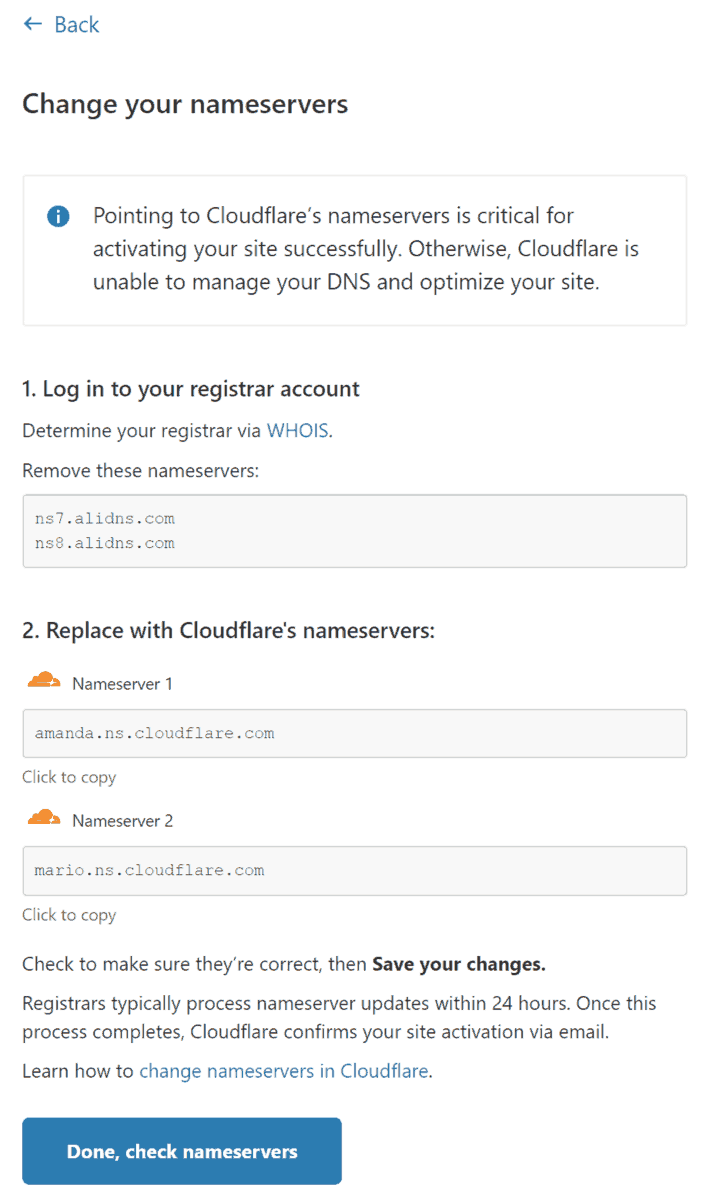
6. After change DNS nameservers, wait up to 24-48 hours.
Please not that, the registrars typically process nameserver updates within 24-48 hours. Once this process completes, Cloudflare confirms your site activation via email.
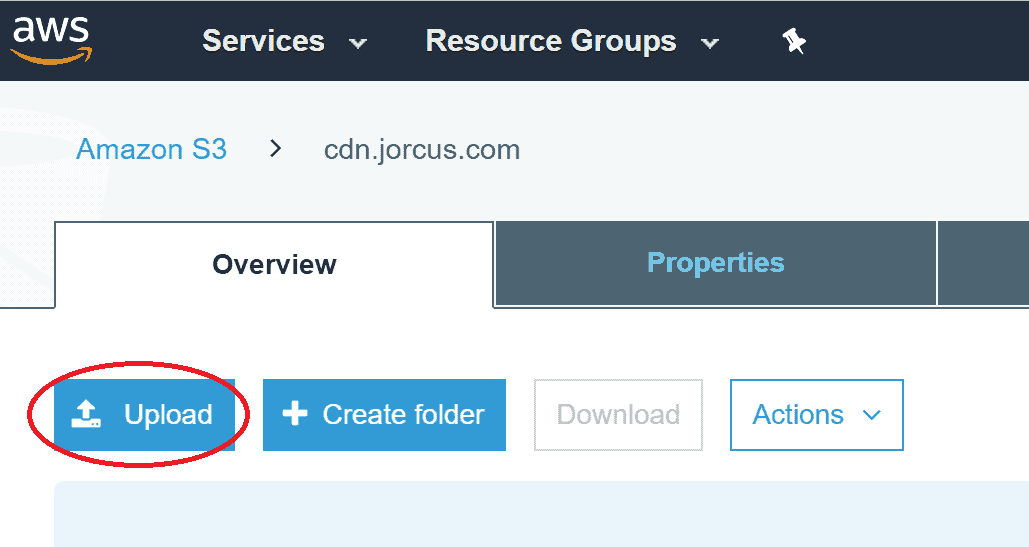
Step 5: Upload File to Amazon S3.
After everything have done, you can now upload file to the Amazon S3 and enjoy the services from Cloudflare.
Step 6: Understand how Amazon S3 URL works.
After upload the file, you will received an URL for the file when click on it as below.
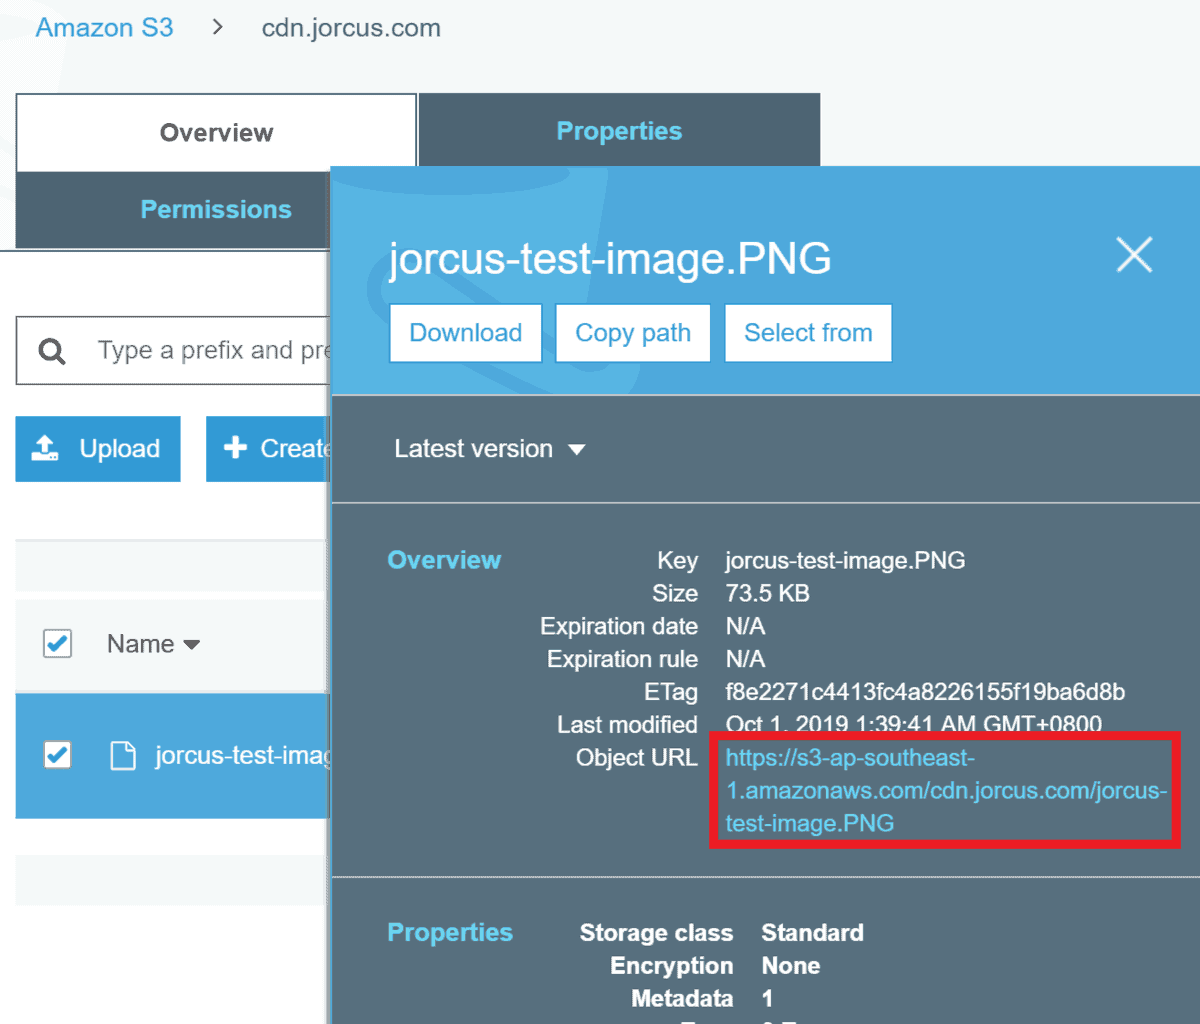
In general, you can access your Amazon S3 file by 3 method. The first two method below you can’t access it because we already set permission in Bucket Policy during the step 3. Also, this method to access your file don’t served under CloudFlare CDN.
https://s3-ap-southeast-1.amazonaws.com/cdn.jorcus.com/jorcus-test-image.PNG
https://cdn.jorcus.com.s3-website-ap-southeast-1.amazonaws.com/jorcus-test-image.PNG
To access it, you can access it directly from the domain u own. This method will served the file under CloudFlare CDN, so it will boost up your image from 2 times faster to 100 times faster. NOTE: I have made the test with 4k video, it speed up at least 20 times faster.
https://cdn.jorcus.com/jorcus-test-image.PNG Last but not least, thanks for reading the post. If you like my blog post and think it’s useful, spread the love by sharing to social media. I would really happy if you do. Again, thanks for your support, hope to see you back again.